Add & Sell Sponsorships
This page will help you with adding and selling sponsorships for event in Auctria.
💼 Ready to offer sponsorships for your event?
This page walks you through how to set them up and sell them—whether that’s online, in person, or directly through your admin tools.
Sponsorships are created as through the Sponsorships dashboard, but with a few extra settings that let you highlight sponsor names and display their logos on your website.
➕ Add a Sponsorship Item
Sponsorships Fields
- Name – Give your sponsorship a clear title (e.g. "Gold Sponsor" or "Table Sponsor").
- Price – Set the cost for the sponsorship level.
- Quantity Available – Limit how many of this sponsorship can be sold (or leave it unlimited).
- Description – Let sponsors know what’s included!
- Sponsor Name and Logo – Upload these so they appear on your website (if applicable).
Website Templates
If you’re using an Auctria website template, these items will automatically appear on your Sponsors catalog and Sponsors page once they’re set up correctly!
💳 Sell Sponsorships
Dashboard Sales
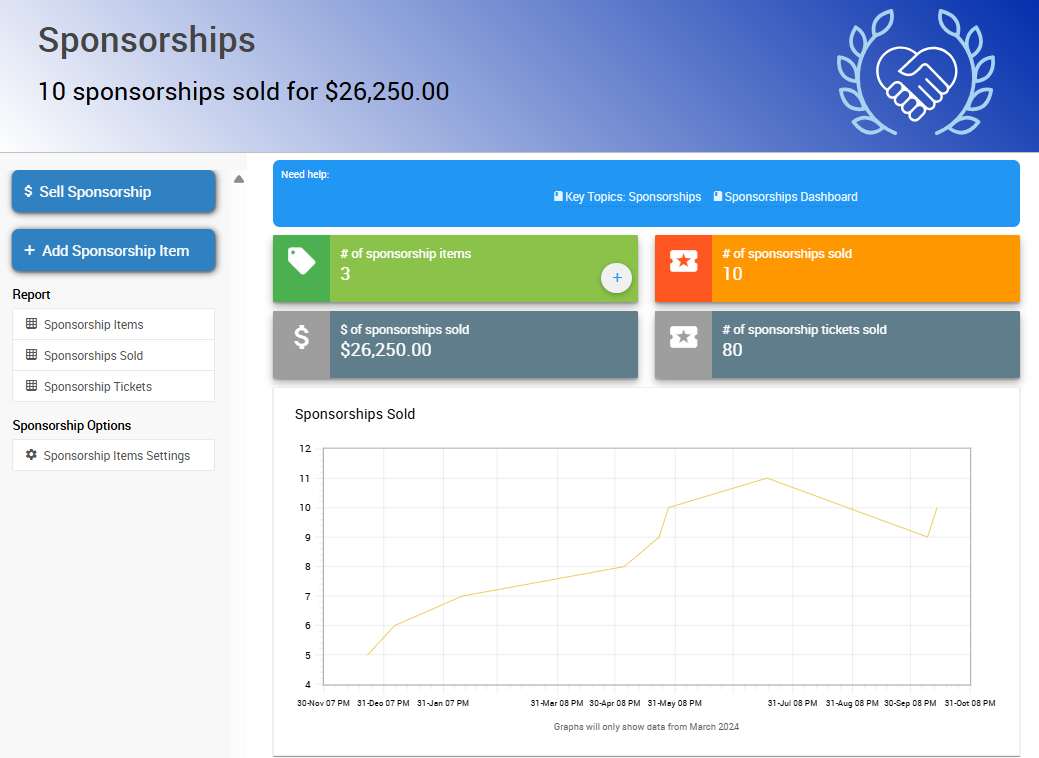
You can sell Sponsorships directly from the Auctria dashboard using the Sponsorships or Sales pages.
- Go to Sponsorships (left sidebar)
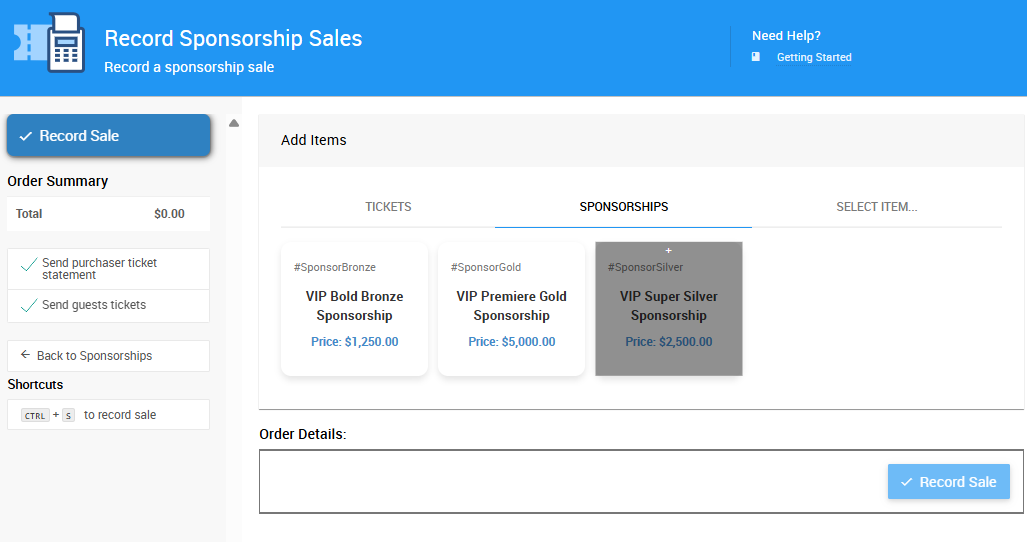
- Click the $ Sell Sponsorship button
- Select the sponsorship item to sell
- Choose the Purchaser
- Assign tickets as needed (you can always add information later)
- Select the payment method and click Record Sale
👉 See How To Sell Sponsorships to learn more.
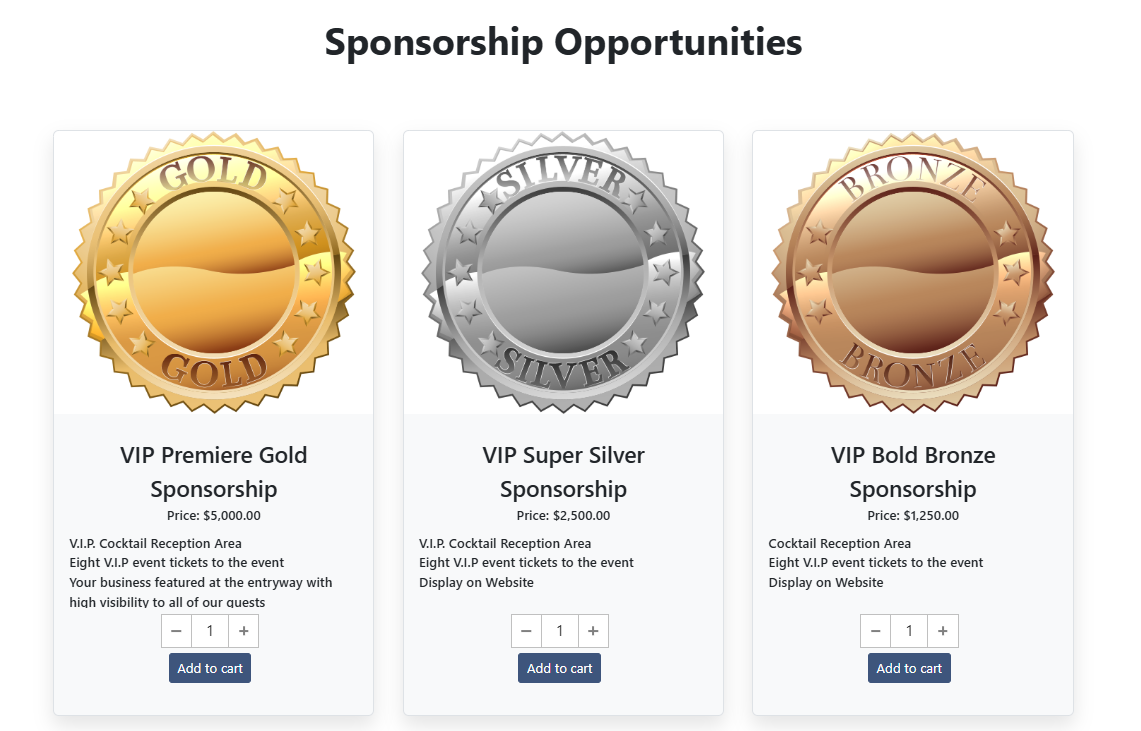
🛒 Website Sales
Sponsorships can be sold directly on your event website.
- Go to Website > Content
- Add or confirm a Sponsors catalog or Sponsors page is published
- Visitors can purchase directly from your public site!
Sponsorship Sales
Sponsorships can also be sold during check-in, via the Admin App, or added to a bidder’s cart just like any other for-sale item.
Assignment Options
Based on the quantity entered and the quantity of event admission tickets associated with the sponsorship item, the checkout page will list the number of tickets available to be assigned to other guests. The guest details information can be entered there as well.
You can assign admission tickets in 3 different ways:
- Assigned to the purchaser and another guest will assign the ticket(s) to the purchaser and guest tickets will not be linked to the purchaser.
- Assigned to the purchaser and their partner will assign a ticket to the purchaser and will assign a ticket to a guest that is Linked to the purchaser (they will share a Paddle#).
- Tickets are assigned to other guests, the purchaser is not attending will assign no tickets to the purchaser and will allow you to enter new guest information for all tickets.
Unique Emails
Keep in mind that a purchaser can only assign a single ticket to themselves. This means that all the email addresses that are supplied for the tickets being purchased should be unique if possible. Supplying email addresses for guests is optional by default.
🧭 What’s Next?
- Want to control how your sponsors are displayed on your website? Head over to the Displaying Sponsors guide.
- Need a refresher on what sponsorships are and how they work? Visit the Introduction to Sponsorships page.
Last reviewed: July 2025