
This guide will show you how to assign seats in Auctria.
Auctria's Tables feature makes it easy to manage seat assignments for your in-person events.
Step 1: Open the Tables Page
Click Tickets → Tables. This opens the Tables page, where you can view the seating for your participants.
Access Tables through Participants
You can also reach the Tables page from Participants → Tables.
Step 2: Open Assign Seating
Click Assign Seating to open the Assign Seating page.
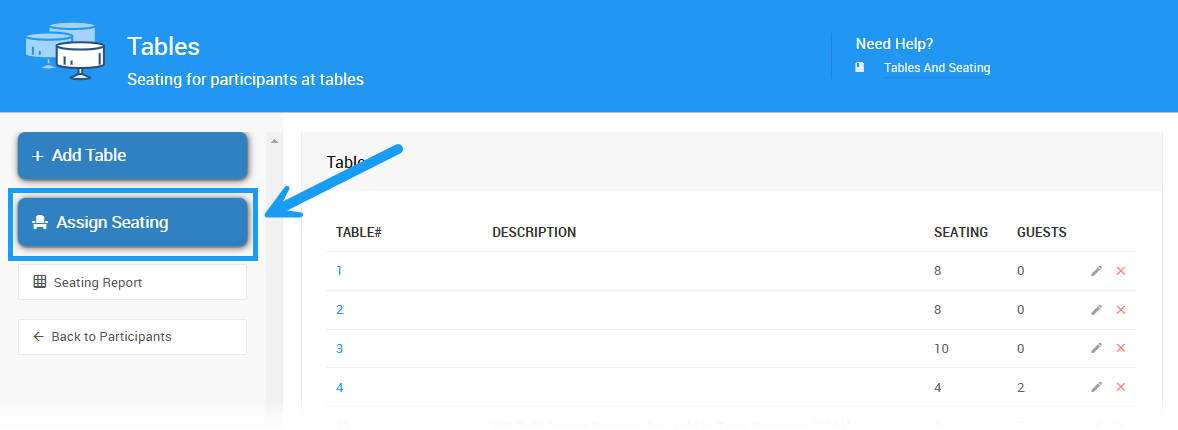
An example from a demonstration event.
By default, this page displays all current tables, as well as participants who have been assigned a ticket.
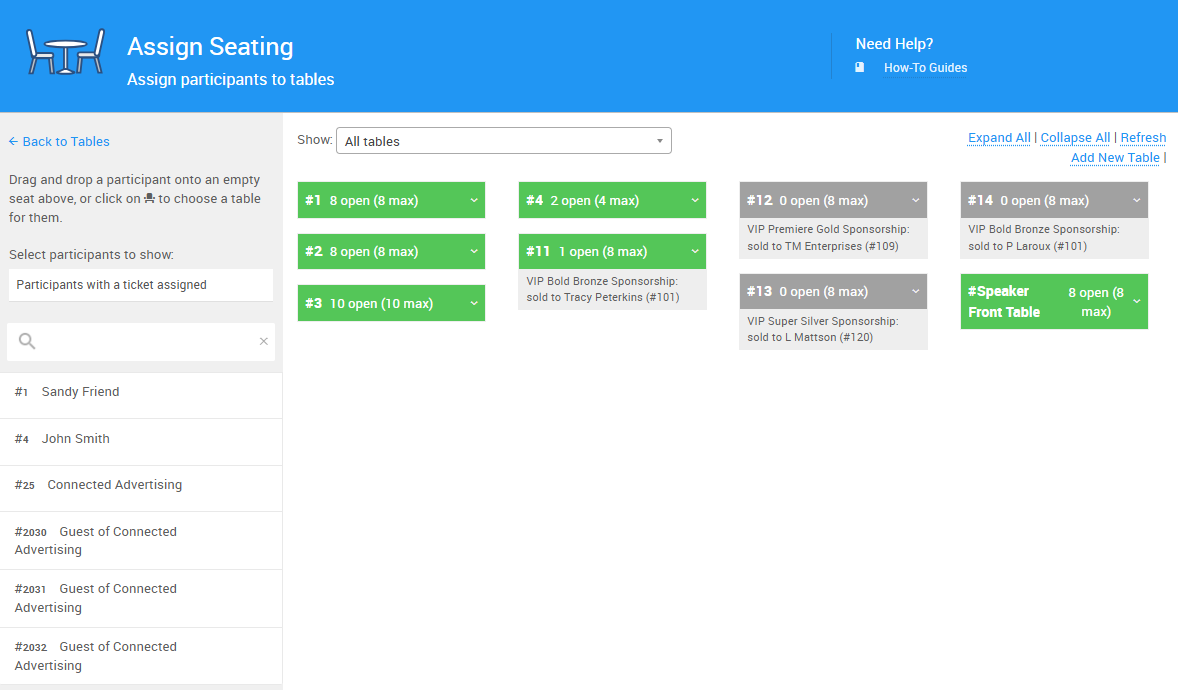
An example Assign Seating page from a demonstration event.
Step 3: Filter Tables and Participants (Optional)
You can filter the tables displayed by adjusting the drop-down menu at the top of the list, choosing between Table Groups or the individual tables you've created.
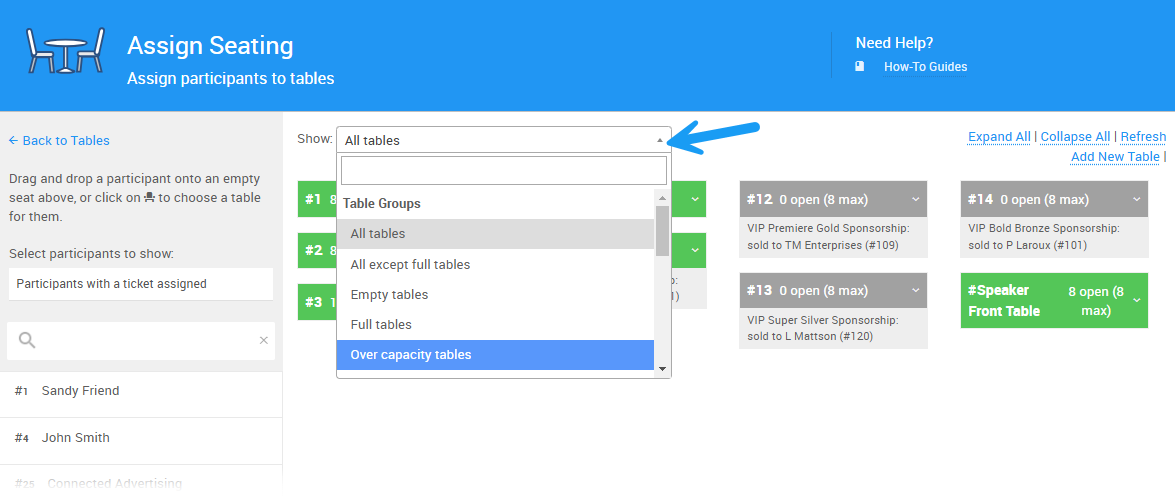
An example from a demonstration event.
You can also choose between viewing participants with a ticket assigned, or all current event participants, by changing the drop-down on the left sidebar to All.
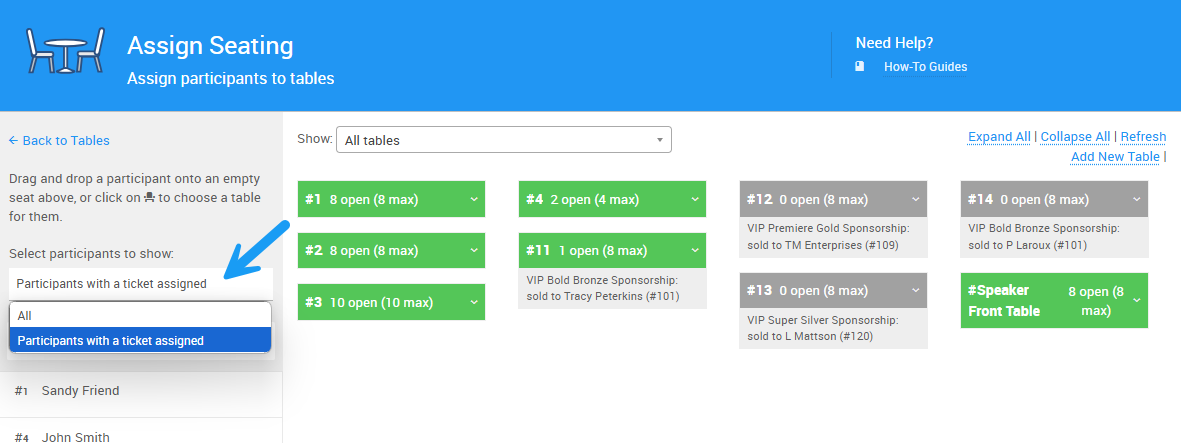
An example from a demonstration event.
To find a specific participant to assign to a table, enter their name into the search bar.
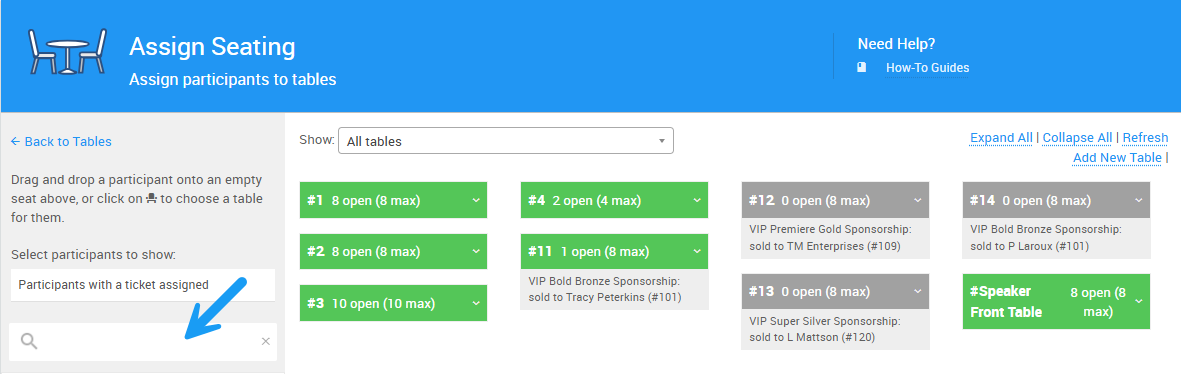
An example from a demonstration event.
Step 4: Assign Participants to Tables
There are two ways to assign a participant to a table:
- Drag and drop the participant onto the table you want to assign them to.
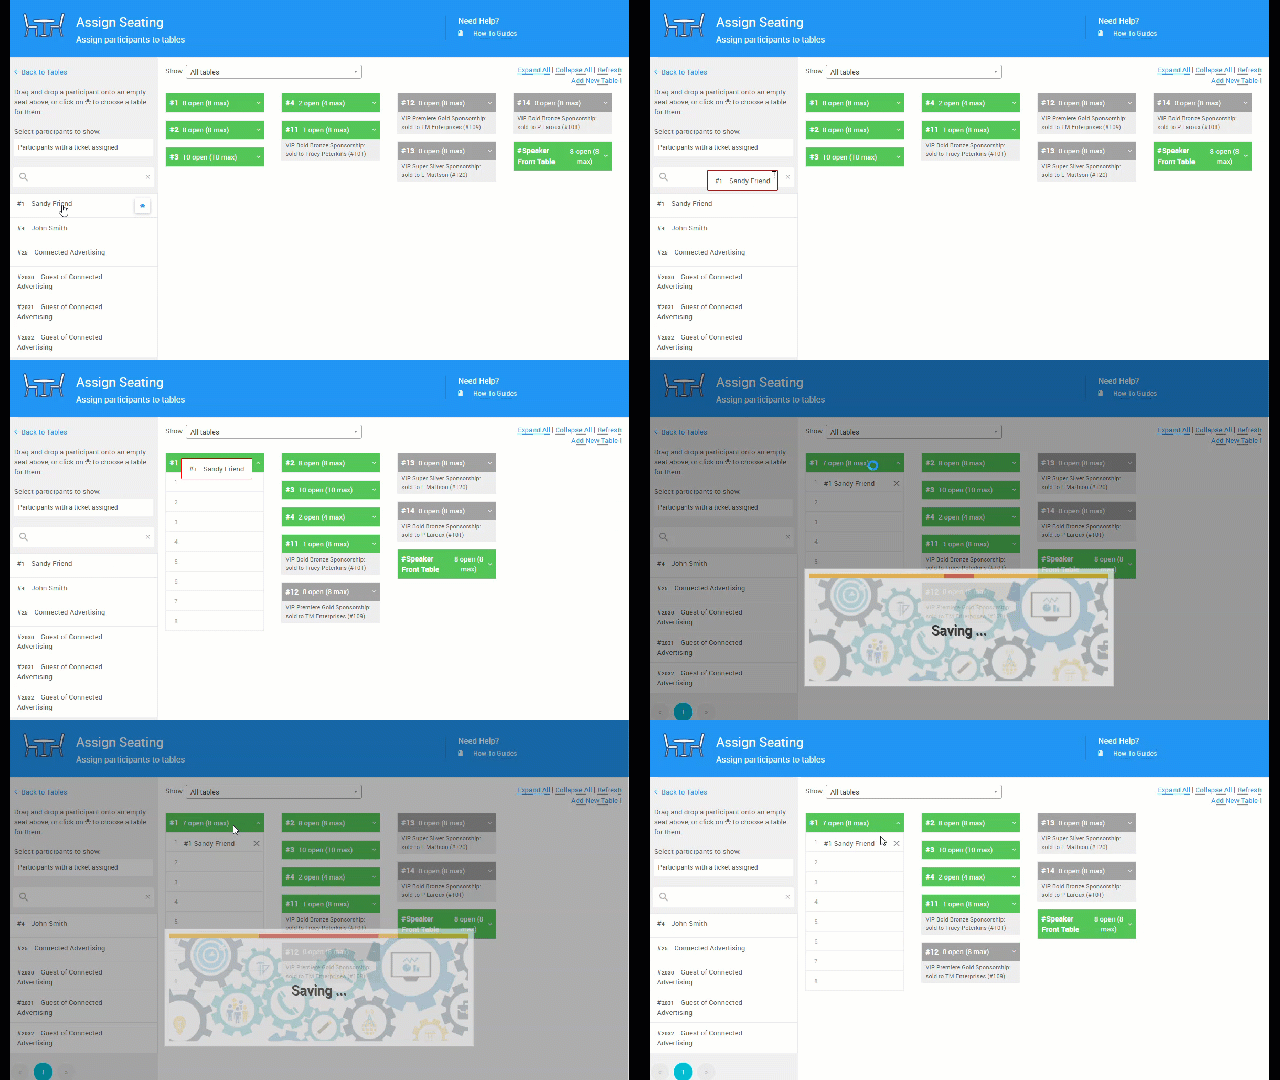
An example from a demonstration event.
- Click the chair icon next to the participant's name in the list, then choose a table from the list.
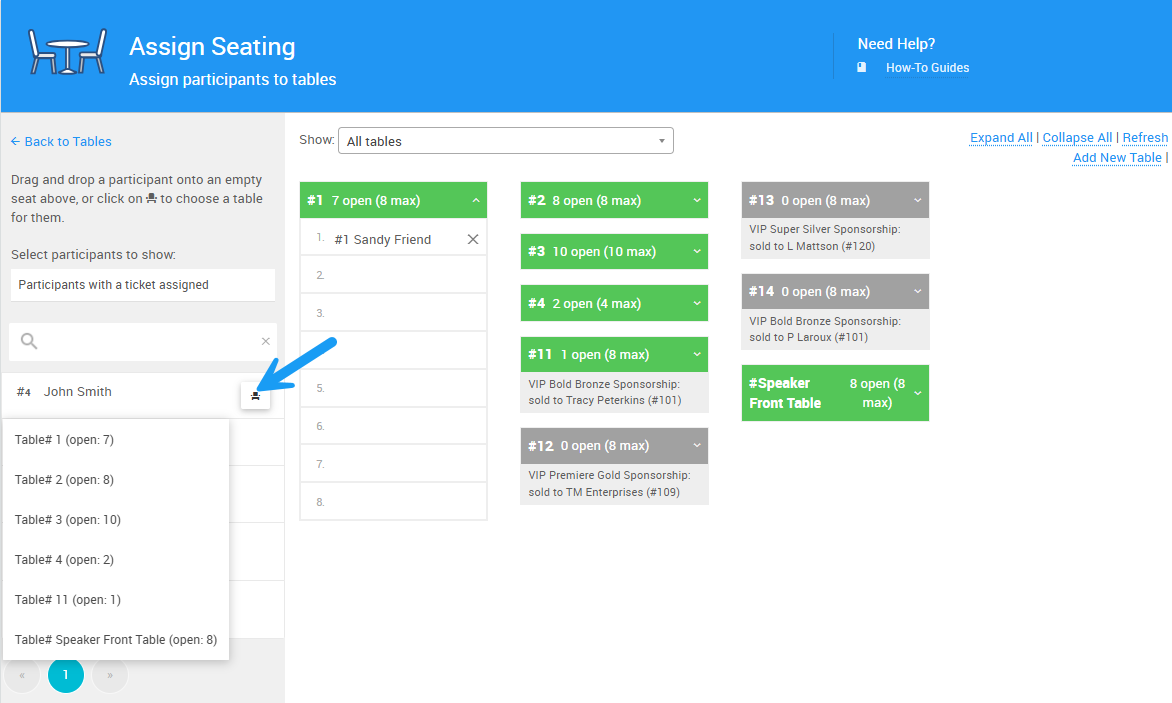
An example from a demonstration event.
The participant's name appears beneath the table they've been assigned to. Click the arrow icon on the right side of a table's bar to expand its list of guests.
Step 5: Remove Participants from Tables
Find the guest's name beneath the table they were assigned to, and click the X mark next to their name to remove them from the table.
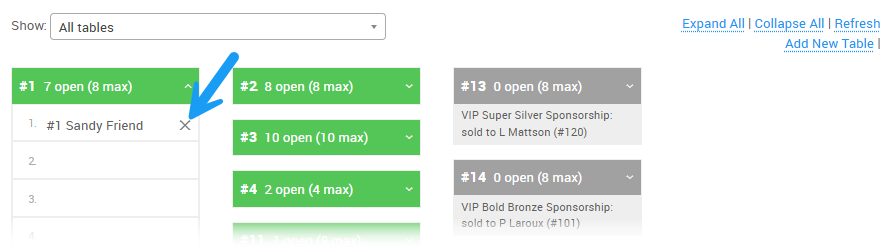
An example from a demonstration event.
The guest's name then reappears in the participant list, where you can reassign their seat as needed.