First Steps
Learn how to sign up for an Auctria license and create your first event.
💳 Step 1: Purchase a License
👉 Visit our Pricing Page to explore plans and find the right fit for your organization’s income that will be achieved solely through the Auctria platform and your event.
🏁 Step 2: Create Your Event
All events in Auctria live inside an Organization — this is like your account’s home base.
During the initial sign-in process, you’ll be prompted to enter your event name and event date.
Your event details can be updated later through the Dashboard under Event on the left sidebar or by using the event tiles in the center of the screen.
Learn more about setting up your Event:
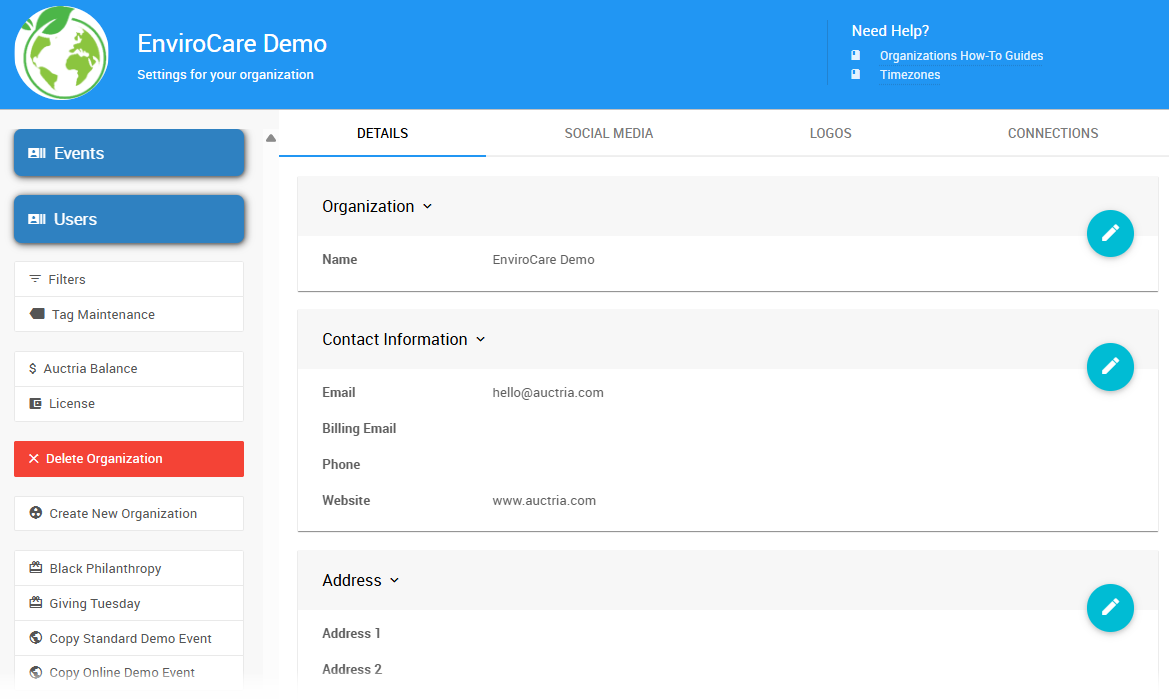
🏢 Step 3: Add Your Organization Info
Each event is tied to an Organization that holds your group’s essential details — such as name, address, and contact information.
To review or update your organization’s details, head to the Dashboard and click Organization on the left sidebar. This will open the Organization page.
Why this matters:
Your organization information is directly linked to your Stripe account and advanced texting setup (if enabled), and must match your official registry records — including tax information.
Learn more about managing your Organization:
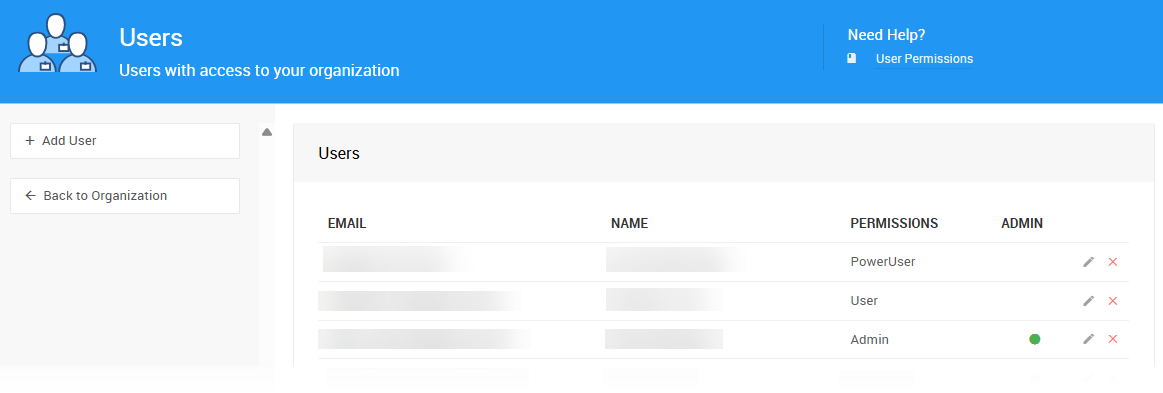
👥 Step 4: Add Admins & Users
Invite users and admins to help manage your event.
You’ll assign User Permissions to control who can access which parts of the event.
Plan Limits
The number of users you can invite depends on your license plan.
Learn more about Adding Users:
💰 Step 5: Connect a Credit Card Processor (Optional, but Recommended)
Want to accept payments directly through Auctria? We integrate with Stripe or Authorize.net.

Learn more about Credit Cards:
⚙️ Step 6: Review Event Settings
Before going live, take a few minutes to review your event’s settings by clicking Event on the left sidebar. This will open your Event Details.
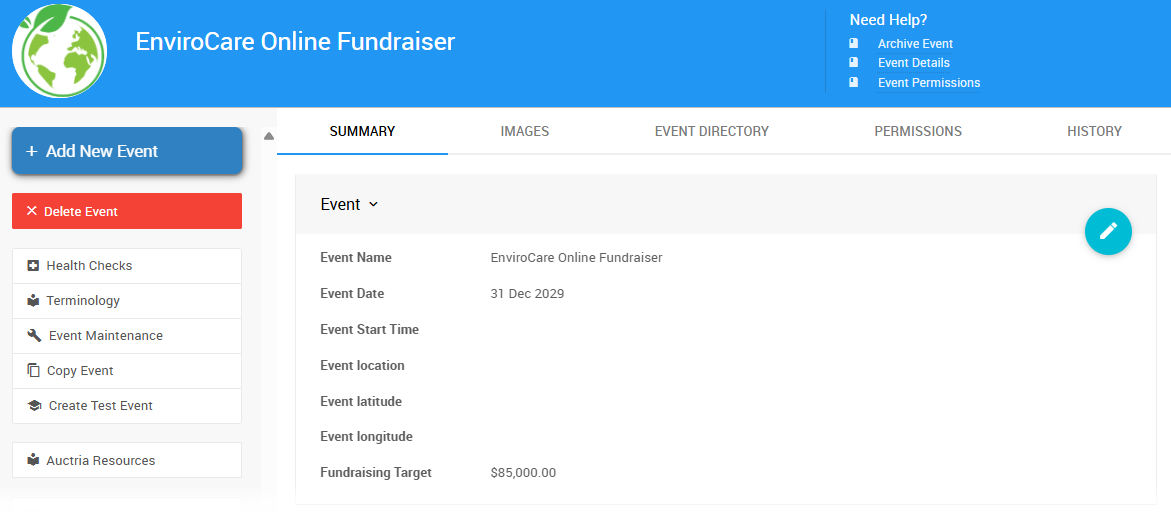
You can also open your Event Details by clicking Settings (left sidebar) Event Settings.

This helps ensure everything — from bidding rules to payment methods — is configured exactly how you want.
Key settings to check:
- Event Details (dates, times, bidding type)
- Payment Options (credit card, cash, check)
- Website & Registration Settings
- Text Messaging (if using)
✅ What’s Next?
Once these first steps are complete, you’re ready to:
- Add auction items
- Build your event website
- Invite participants & start promoting!
Now you’re ready to plan your event!
🎉 Need a Full Event Planning Checklist?
Check out our Auctria Timelines & Checklists.
Auctria Pro-Tip from Launch Services!
Need more help?
Consider Auctria Launch and let us do the heavy lifting for you.
We’re here to make sure your event is a success!
Last reviewed: October 2025