
Learn how to configure the Footer row element, which displays your organization's contact details across every page of your event website.
The Footer element is added to event websites by default when they are created. It pulls contact details from your Organization record as default values, which can be overridden as needed.

The Footer on an event website in Edit mode.
Adding the Footer to a page
The Footer element is best placed in the footer zone so it appears consistently across all pages. To re-add it, drag the Footer element from the Website Editor Sidebar into a row in the footer zone, or drag More Row Content onto the page and select Footer from the Choose Row window.
Selecting the Footer in the Website Editor opens the Footer panel settings in the Editor sidebar.
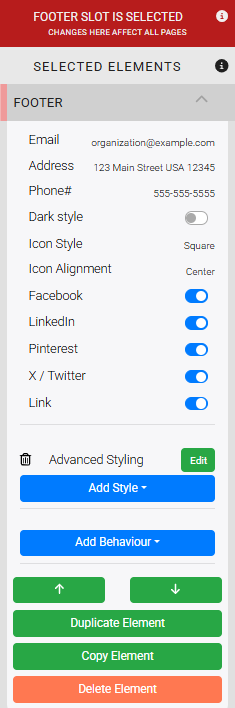
An example of the Footer settings in the Editor sidebar.
Changes affect all pages
The footer zone is a shared template — editing it updates the footer on every page of your site. A red banner at the top of the Website Editor Sidebar indicates when you are editing a shared zone.
Footer Settings
Contact Details
Each field defaults to the value set in your Organization record but can be overridden individually in the footer.
| Setting | Description |
|---|---|
| The email address displayed in the footer. | |
| Address | The mailing address displayed in the footer. |
| Phone# | The phone number displayed in the footer. |
Dark Style
Toggles the footer's color scheme to better complement your site's Website Theme Settings. Use when your theme uses a dark background in the footer zone.

An example of the Footer in Dark style.
See Common Element Actions for more details on managing the Footer element.