
Learn how to change a paper or live auction event into an online only event, from switching your items to online bidding to updating your website and tickets.
Work through the sections below in order. Skip any that don't apply to your event, such as the ticket sections if you didn't sell tickets.
Change your items to online bidding
Online items open and close automatically at the times you set, so they need to use the Online Bidding Type type. Use mass changes to switch all your items at once.
- Open the All Items list report and click the Edit icon in the report header. The mass changes panel opens.
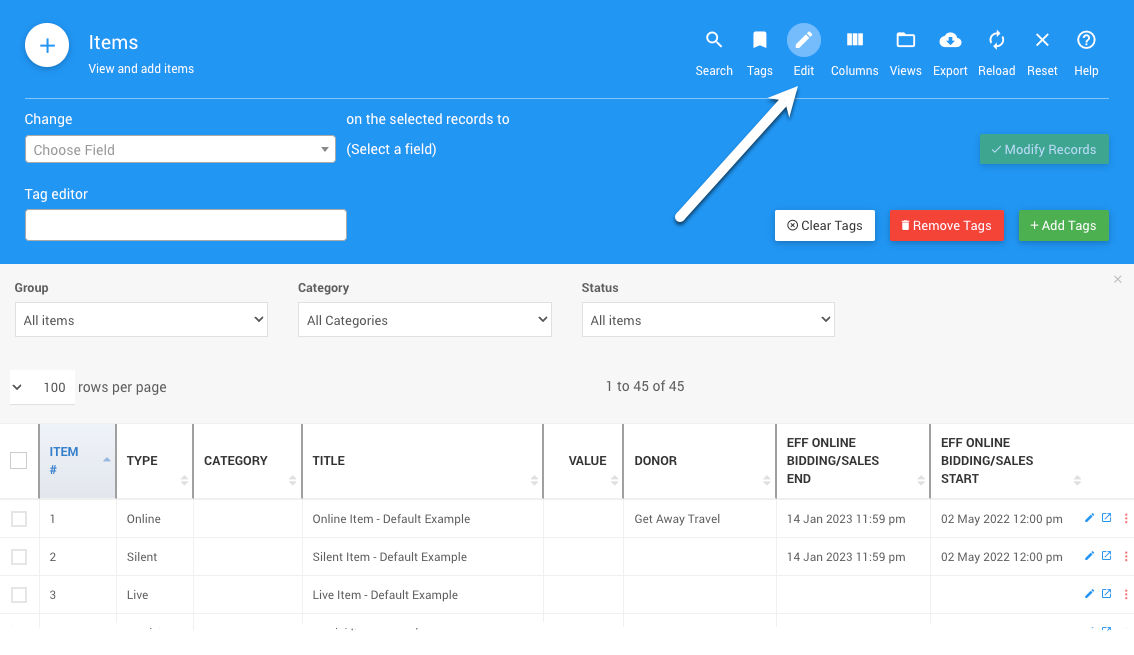
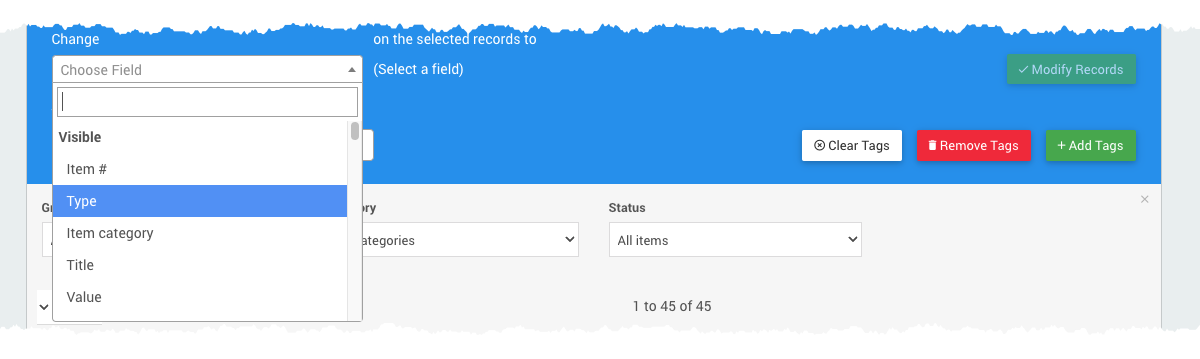
- In Change, select Type.
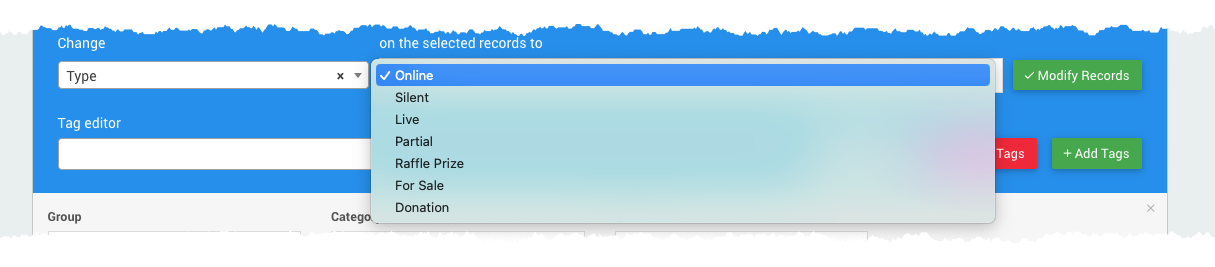
- In on selected records to, select Online.
- Select the items to change. To select every item on the current page, select the checkbox at the top-left of the list, beside the column headings.
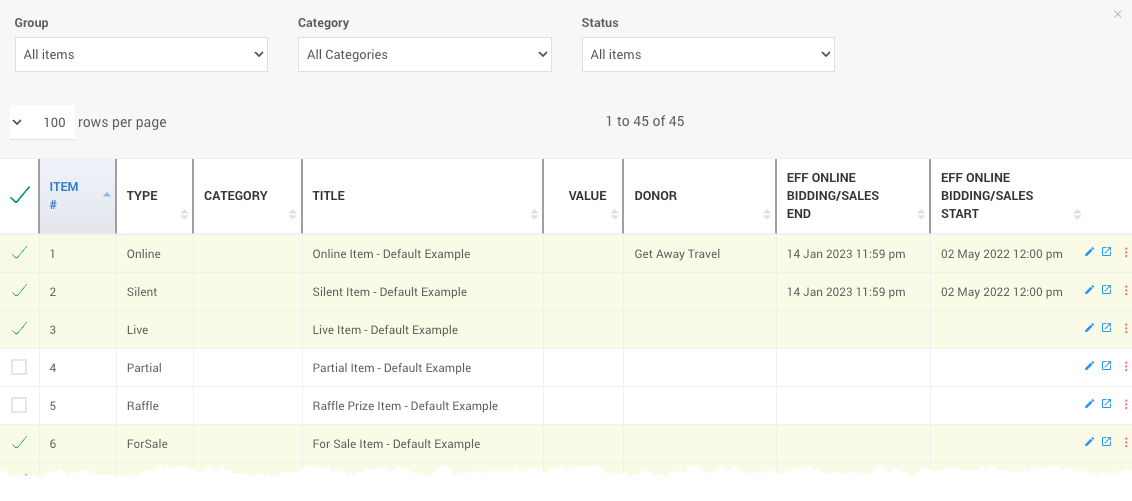
- Click Modify Records, then click Continue to confirm.
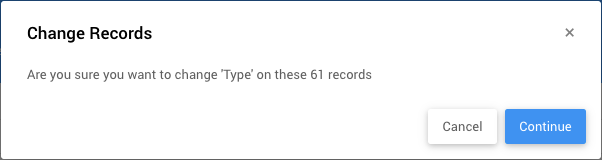
See How To Bulk Edit Multiple Records for more on mass changes.
Set the online bidding times
Set when online bidding opens and closes. These times apply to every Online item unless you set different times on an individual item.
- Click Settings (left sidebar) → Online Bidding.
- Set the online bidding start and end times. See Online Bidding Times.
- Review the other online bidding settings, such as maximum bidding, bid extension rules, and notifications. See Online Bidding Settings.
Different times for some items:
To have an item open or close at a different time, set override times in the item's bidding rules. See Item Details.
Stop selling tickets
If you sell tickets on your event website, you can stop showing them in either of these ways:
| Option | How |
|---|---|
| Hide the ticket items | On each ticket item, set Show in default web purchase element to No. The tickets no longer appear in the default ticket purchase element on your website. |
| Remove the Tickets page | Remove the Tickets page from your website menu. See Configuring Menu Entries. |
You could also keep the Tickets page and change its text to explain that the event is now online, and encourage visitors to register and bid. See Text Element.
Refund tickets or turn them into donations
If participants already bought tickets, you can refund them, or with the participant's agreement, keep the payment as a donation.
Refund tickets
Turn a ticket into a donation
This uses two dashboard pages. Open each in its own browser tab.
Tab 1: Participants
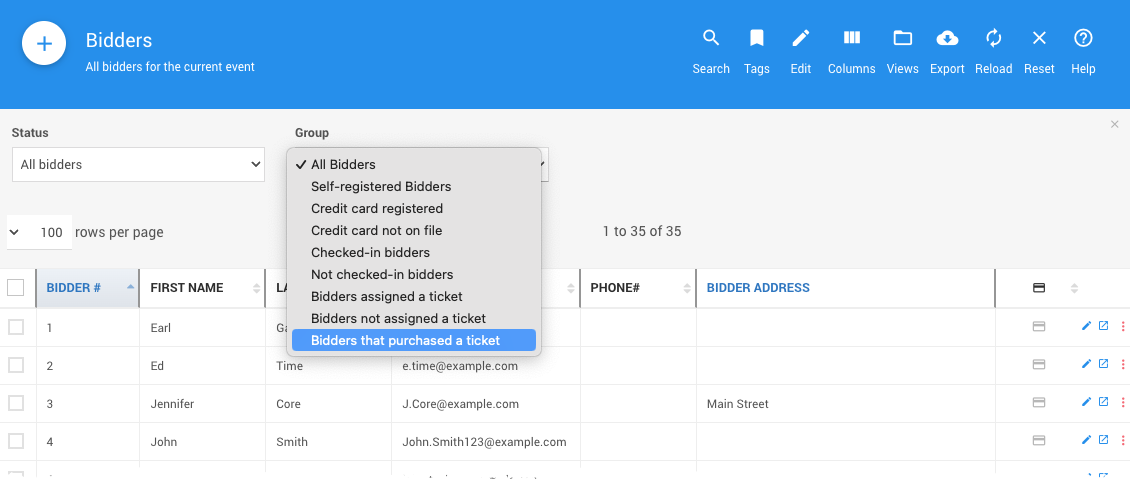
- Go to Participants and open the All Participants list report.
- In the Group list, select Participants who purchased a ticket.
Tab 2: Donations
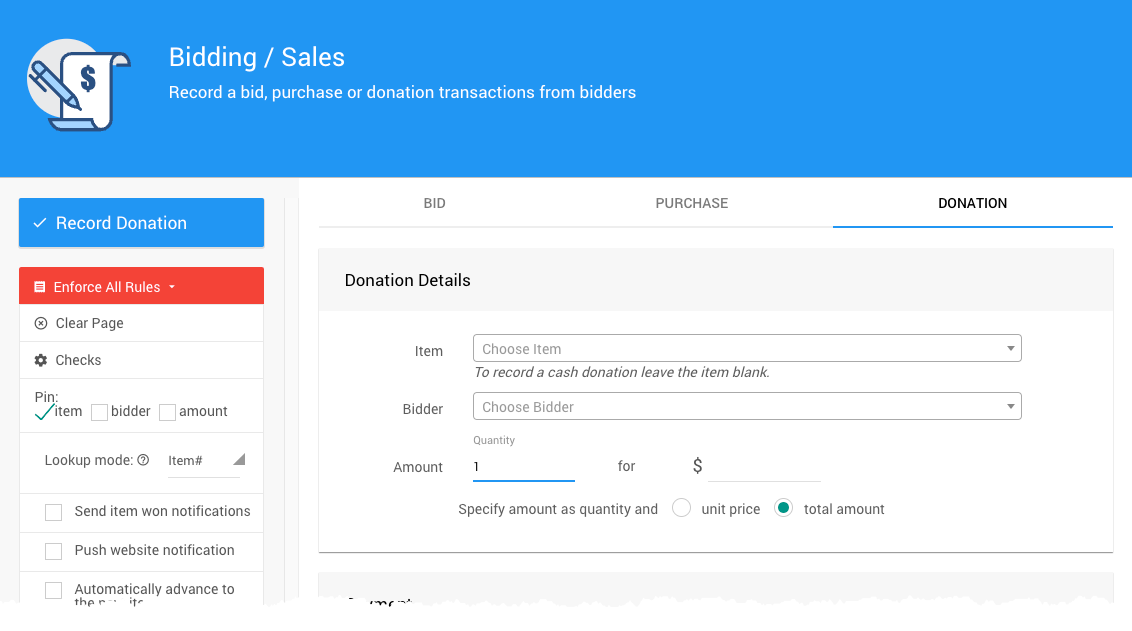
- Go to the Donations Dashboard and open Record Donations. See Record Donations.
For each participant
- In tab 1, open the participant and go to their Activity tab.
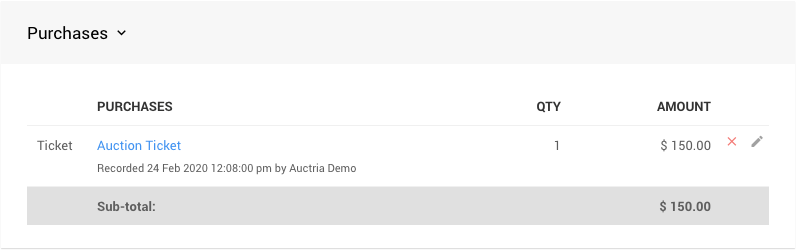
- Under Purchases, note the ticket's price, then delete the ticket purchase. See Editing Transactions.
- In tab 2, enter the participant's Paddle# and the ticket price as the donation amount.
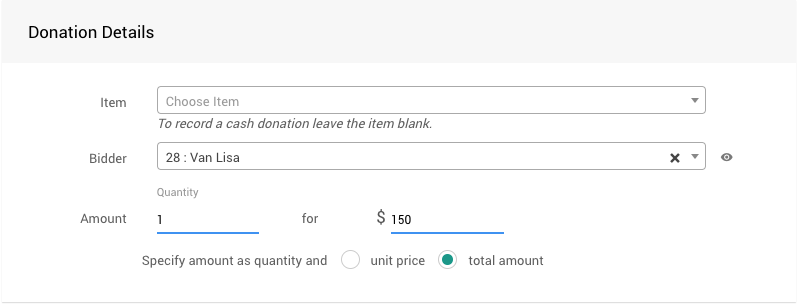
- Click Record Donation.
- In tab 1, click the right arrow to go to the next participant who purchased a ticket.

Update your event website
Review your website so it matches the new format:
- Update your event description to explain the change. See Text Element.
- Remove or update the Tickets page, as described in Stop selling tickets.
- Add more catalog pages if you want to group items, and choose which items each one shows. See Manage Pages and Configure Items Displayed.
If you don't have a website yet, create one from the Core template. See How To Create A New Event Website.
Review registration
Decide how participants will register to bid now that the event is online. See Registration/Checkout.
- Should registration be open to everyone, or only to people who had tickets?
- Do you need to import participants from another list?
- Should you send participants their access details? See Participant Online Access And Tokens.
Refunded tickets:
Participants whose tickets you refunded keep the participant record created with their ticket, so they're still registered to bid.